

Cross-chain interoperability is the backbone of modern Decentralized Finance (DeFi). As ecosystem diversity expands across Ethereum Layer 1, Layer 2 scaling networks (Arbitrum, Optimism, Base), and alternative Layer 1 blockchains (Solana, Avalanche), moving digital assets seamlessly between networks has become an essential daily task for Web3 users.
However, cross-chain bridges are also among the most targeted vectors in cryptocurrency. According to security analytics aggregated by DefiLlama, billions of dollars in digital assets have been lost in cross-chain bridge exploits caused by smart contract vulnerabilities, compromised multi-sig validators, and liquidity drain attacks. Beyond total protocol hacks, everyday users frequently lose funds to excessive slippage, front-running bots, and incorrect network configurations.
Learning how to bridge tokens safely requires understanding bridge mechanics, setting conservative slippage parameters, verifying official smart contract addresses, and revoking dangerous approval permissions after completing transactions.
Quick Summary: Cross-Chain Safety Matrix
Before executing any cross-chain asset transfer, verify your workflow against these non-negotiable security steps:
| Risk Area | Threat Vector | Technical Safety Protocol | Impact on Assets |
| Protocol Hacks | Exploded smart contracts or compromised validator keys. | Use established native bridges or audited liquidity aggregators with high Total Value Locked (TVL). | Prevents total loss of principal funds. |
| High Slippage | Illiquid bridge pools resulting in poor execution rates. | Set manual slippage caps (0.5% to 1.0%) and use DEX/bridge aggregators. | Guarantees fair value exchange during swaps. |
| Malicious Approvals | Infinite token permissions allowing wallet drains. | Revoke smart contract allowances immediately after bridge transactions complete. | Shields remaining wallet assets from future exploits. |
| Phishing / Fraud | Fake bridge interfaces capturing private keys. | Bookmark verified dApp URLs directly from official ecosystem documentation. | Prevents credential and private key theft. |
How Cross-Chain Bridges Work (and Why They Are Vulnerable)
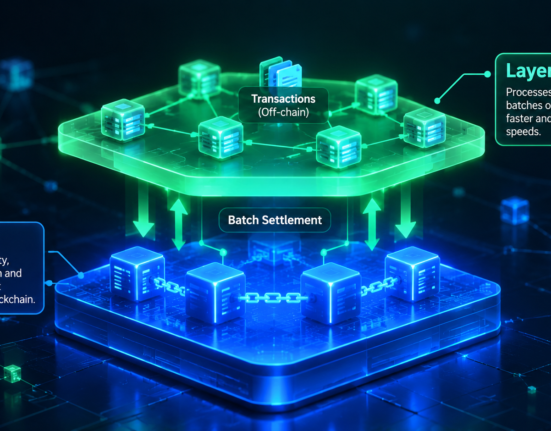
To move tokens safely, you must first understand what actually happens when you push a token across a bridge. Blockchains are isolated ledger systems; Ethereum cannot natively read or execute smart contract logic on Solana or Arbitrum without an intermediary protocol.
Bridges generally rely on three main operational mechanisms:
-
Lock-and-Mint Bridges: The protocol locks your native token in a smart contract on the source chain and mints an equivalent “wrapped” synthetic asset (e.g., wETH) on the destination chain.
-
Burn-and-Mint Bridges: The protocol burns the native token on the source chain and mints an authorized native version on the target chain.
-
Liquidity Pool Bridges: The bridge relies on automated market makers (AMMs) or liquidity pools holding native assets on both chains, swapping pool reserves dynamically.
Why Bridges Attract Hacks
Bridges act as central honeypots. Smart contracts holding hundreds of millions of dollars in locked collateral become lucrative targets for malicious actors. If a hacker discovers a flaw in the bridge’s smart contract code or compromises the private keys of the validator set responsible for signing transfers, they can drain the locked funds, leaving destination wrapped tokens entirely unbacked and worthless.
Documentation published by Ethereum.org emphasizes that users should differentiate between trust-minimized native bridges (like canonical Rollup bridges) and third-party custodial bridges, which rely on external validator signers.
6 Vital Steps to Bridge Tokens Safely
1. Prioritize Canonical Bridges and High-TVL Aggregators
When transferring assets to a Layer 2 network or alternative blockchain, always evaluate the bridge’s security track record before depositing funds.
-
Use Native/Canonical Bridges First: When moving funds from Ethereum to Layer 2s like Arbitrum or Optimism, use their official canonical bridges whenever possible. While canonical bridges can take longer to settle withdrawals back to Layer 1, they carry the security assurances of the underlying network.
-
Leverage Audited Bridge Aggregators: Use established cross-chain routing aggregators like Socket (Bungee), LI.FI (Jumper), or Router Protocol. Aggregators automatically compare routing paths, fees, and liquidity depth across multiple verified bridge protocols to find the safest route.
-
Inspect Protocol Audits and TVL: Avoid brand-new bridge protocols offering low fees or promotional token rewards if they have low Total Value Locked (TVL) or lack independent third-party security audits from firms like OpenZeppelin, CertiK, or Trail of Bits.
2. Control Slippage and Avoid Low-Liquidity Pools
Slippage refers to the difference between the expected price of a trade and the actual executed price. When bridging rare tokens or transferring large sums through low-liquidity bridges, slippage can eat away a massive percentage of your capital.
-
Set Custom Slippage Tolerance: Never leave your bridge’s slippage tolerance on “Auto” during volatile market conditions. Set a strict manual slippage limit between 0.5% and 1.0%. If market fluctuations exceed this threshold, the transaction will revert rather than execute at a terrible rate.
-
Watch for MEV and Front-Running: On public blockchains, Maximal Extractable Value (MEV) bots monitor mempools for large pending bridge transactions and trade ahead of them to manipulate execution prices. Using aggregators with private RPC endpoints (such as Flashbots Protect) prevents MEV front-running.
-
Bridge Native Stablecoins over Low-Cap Tokens: If you need to move large capital, consider swapping volatile or obscure tokens into deep native stablecoins (such as native USDC or USDT) on a liquid DEX before bridging, then swap back on the destination network.
3. Test with a Small “Dust” Transaction First
One of the simplest yet most effective security habits in Web3 is running a small test transaction before moving substantial capital.
-
Verify the Test Transfer: Send a small nominal amount (e.g., $10 to $20) across the bridge first.
-
Confirm Arrival on Target Chain: Open the destination network’s block explorer (e.g., Arbiscan, Etherscan, Solscan) to verify that the funds arrived in your wallet address properly and that the asset received is the authentic, verified token contract.
-
Proceed with Full Capital: Only execute your primary transfer after the test transaction confirms cleanly on the target chain.
4. Bookmark Verified URLs to Avoid Phishing Scams
Phishing scams in Web3 frequently involve fake Google Ads or malicious social media links that mimic popular bridge interfaces. Connecting your wallet to a spoofed bridge site allows malicious drainer scripts to request unlimited approvals or signature permits that strip your wallet clean.
-
Never Click Sponsored Search Engine Links: Search ads for bridge protocols often lead to malicious phishing clones.
-
Source Links from Official Directories: Obtain official dApp URLs directly from verified ecosystem listings (like CoinGecko, DefiLlama, or official project GitHub repositories).
-
Bookmark Official Apps: Once you verify an authentic bridge interface URL, save it to your browser bookmarks and access the dApp exclusively through that link.
5. Never Grant Infinite Token Approvals
To bridge ERC-20 tokens, smart contracts require your permission to interact with the assets in your Web3 wallet. Many bridge interfaces ask for “Unlimited Allowance” by default to save you gas on future transactions.
-
Custom-Set Approval Limits: Whenever your wallet popup (such as MetaMask, Rabby, or Coinbase Wallet) asks for spend permissions, manually edit the allowance field to match the exact amount you intend to bridge for that single transaction.
-
Revoke Approvals Post-Bridge: Once your bridge transfer completes, use permission management tools like Revoke. cash or Etherscan Token Approval Checker to immediately cancel active smart contract allowances. or Etherscan Token Approval Checker to immediately cancel active smart contract allowances. If a bridge protocol suffers an exploit months later, accounts with zero active allowances remain completely safe.
6. Verify Gas Token Balances on the Destination Network
A common operational roadblock for users new to bridging is getting tokens stuck on a destination chain because they lack the native network gas token required to make further transactions.
-
Ensure Destination Gas Availability: For example, if you bridge USDC from Ethereum to Arbitrum, you must hold a small amount of native ETH on Arbitrum to pay gas fees for subsequent swaps or transfers.
-
Use Gas-Refuel Features: Many modern bridge aggregators offer a built-in “Gas Refuel” feature that automatically converts a small fraction of your bridged funds into the target chain’s native gas token during the transfer process.
Integrating Digital Security Habits Into Your Workflow
Maintaining strong security hygiene when interacting with public blockchain networks requires a systematic approach to hardware, network connections, and account access.
If you frequently conduct Web3 transactions or manage client crypto assets while traveling or working remotely, reviewing cybersecurity essentials for remote freelancers on public wi-fi will help you secure your internet connection against local packet sniffing and malicious network hijacks.
Furthermore, keeping your software utilities, hardware wallets, and password managers updated ensures your Web3 operations remain protected. Exploring essential digital tools for modern freelancers and remote professionals offers valuable software recommendations to build a secure, efficient digital setup.
Safe Token Bridging Summary Checklist
-
Protocol Selection: Stick to official canonical bridges or top-tier audited aggregators with high TVL.
-
Slippage Control: Set manual slippage caps between 0.5% and 1.0%, and check pool liquidity before initiating large transfers.
-
Verification: Perform a small test transaction, double-check target wallet addresses, and access dApps exclusively through verified browser bookmarks.
-
Post-Transaction: Edit approval allowances to exact amounts and revoke smart contract permissions using Revoke. Cash out immediately after bridging.
By following a disciplined verification routine, managing smart contract permissions, and choosing audited liquidity routes, you can move assets seamlessly across blockchains while keeping your crypto portfolio secure.
Want More Insights to Grow Your Digital Presence & Daily Productivity?
Whether you need to fix your website’s technical performance or build a smarter, burnout-free work routine, NewsUpTo delivers practical guides to keep you ahead.





Leave feedback about this